Over 1.18 billion people log onto Facebook every day, and the numbers are increasing every year! You need to get in on this action by creating a Facebook Business Page.
Important: having a personal Facebook account is not the same as having a Facebook Business Page, and in order to reap full benefits, you have to create the business page.
Time is money, and we’ve only got about 4.5 minutes left, so lets get to work.
Step 1:
- Login to your personal Facebook Account
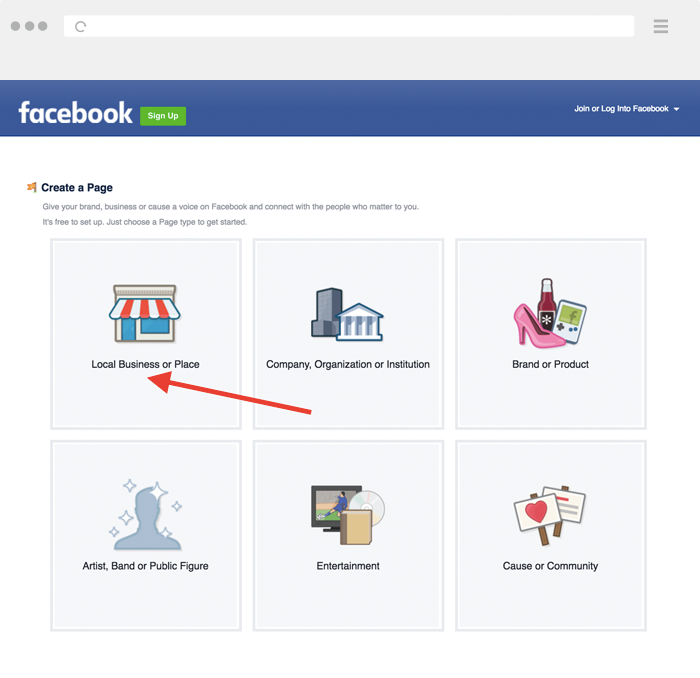
- Go to this link and click “Create a Page”
- Click “Local Business or Place”
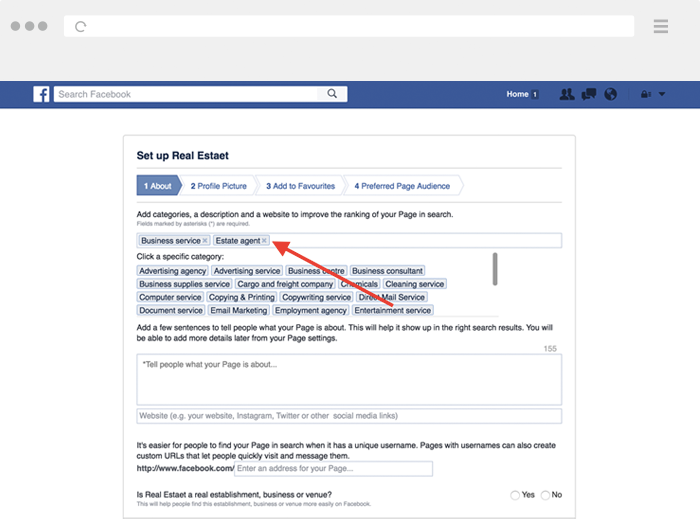
- Select “Business Service” and enter your brokerage office address
Step 3:
- Add “Estate agent” category
- Add a description including some of your sought after keywords and communities you may focus in. Want to learn more about keywords? Click here
- Add your website URL
- Enter a unique URL with your full name to make yourself easier to find one Facebook
- Select “Yes” for the last question
Step 4:
- Upload a professional photo of yourself or your brokerage logo
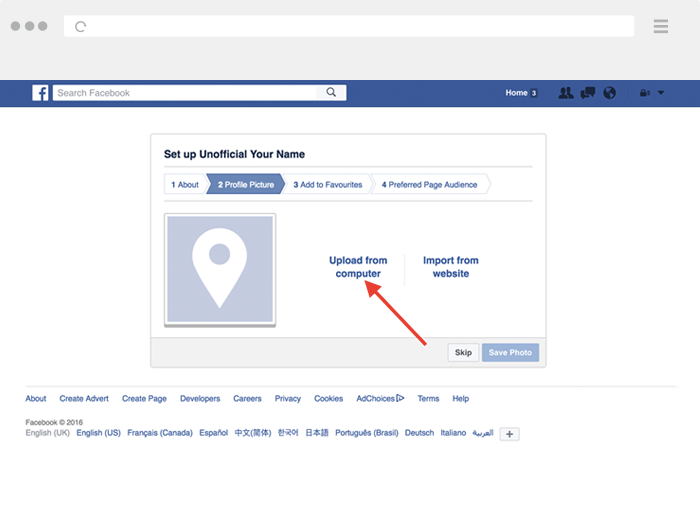 Step 5:
- Click “Add a Button”
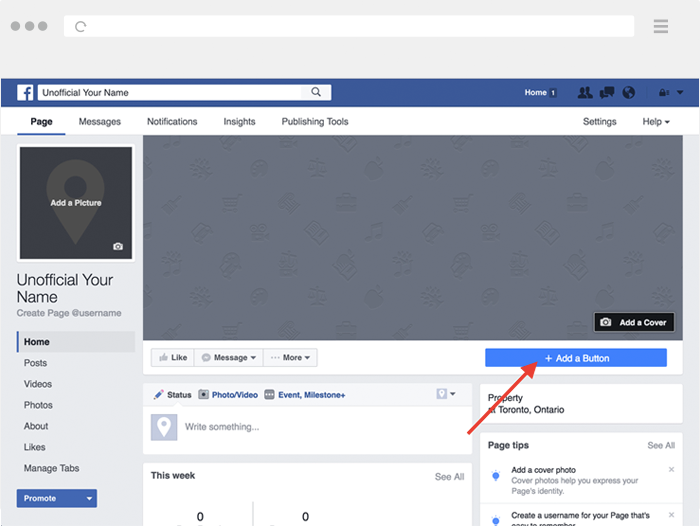
Step 6:
- Select “Learn More” Option
- Enter your website URL

Step 7:
- Start posting, but remember: you should always try to include your website URL in your posts to drive more traffic to your website!
For example, we did a blog post recently on real estate SEO and immediately published it on our Facebook Business Page. This is what it looked like:
Pro Tip: Use Bitly to shorten your URLs before sharing them on your social media profiles. It will use less characters, make your post look more professional, and give you valuable “click” analytics.
Well done! Be sure to ‘Like’ Web4Realty on Facebook Here.
